A tutorial introducing how to implement custom materials from scratch using a texture and a single directional light.
Contents
Introduction
This tutorial will build further on the textured material from the previous tutorial. Because unshaded textures are not the sexiest of materials, we’ll take small steps towards building more compelling shaders by introducing a single light. As usual, this is a tutorial on how to use the lowest level Away3D material classes, meaning it’s not a tutorial on lighting calculations or matrix math. Those topics have been covered many times before in books and articles.
The basic material setup
The setup for the material classes remains largely the same compared to TrivialTextureMaterial and TrivialTexturePass from the previous tutorial, but let’s call them SingleLightTextureMaterial and SingleLightTexturePass this time. We’ll be using the deactivation approach outlined last time using the properties _numUsedStreams and _numUsedTextures. From here on, we’ll review the changes necessary to implement lighting based on the previous material.
Providing the AGAL code
We’ll focus on the actual AGAL code before considering how to set the render state, since that will depend on the code we write here. The code necessary for texture sampling will remain the same, but now we’ll need to modulate the sampled texture colour with the light strength, assuming a perfectly white directional light.
To calculate the light, we’ll need a few things. Since we’re using a directional light for which the light direction is constant throughout the whole scene (a cheap approximation of very distant light sources such as the sun), we need the light direction. We’ll also need the vertex normals to perform the lighting calculation. We’ll perform per-pixel lighting, which means the vertex normals need to be passed on to the fragment shader, and the light direction will be assigned to a constant register in there. The vertex normals will be placed in the first available vertex attribute slot (va2). The light info is the only fragment shader constant data so far, we can simply use fc0.
Once we have this data, performing the lighting calculation is as easy as applying the simple “dot3” Lambert formula, which I’m sure you’ve read about by now ;) One thing to note is that for this example, we choose to perform lighting calculations in model space. This simplifies our shader code in that we don’t need to transform positions and vertex normals to any other space.
The following code only performs diffuse lighting. Specular reflections are left as an exercise for the reader. (I’ve just always wanted to say that exact sentence! :) )
/**
 * Get the vertex shader code for this shader
 */
override arcane function getVertexCode() : String
{
 return  "m44 op, va0, vc0\n" + // transform to view space
   "mov v0, va1\n" +  // pass on uv coords
   "mov v1, va2"   // pass on normals
}

/**
 * Get the fragment shader code for this shader
 * @param fragmentAnimatorCode Any additional fragment animation code imposed by the framework, used by some animators. Ignore this for now, since we're not using them.
 */
override arcane function getFragmentCode(fragmentAnimatorCode : String) : String
{
 return  "tex ft0, v0, fs0 <2d, clamp, linear, miplinear>\n" +
   "nrm ft1.xyz, v1\n" +     // renormalize interpolated normal since attribute interpolation changes lengths
   "dp3 ft2.x, fc0.xyz, ft1.xyz\n" + // standard dot3 lambert shading: d = max(0, dot3(light, normal))
   "max ft2.x, ft2.x, fc0.w\n" +  // fc0.w contains 0, so this clamps to 0
   "mul oc, ft0, ft2.x";
}
(De)Activating the pass
Actually, nothing changes while activating the pass. We still only need to set the texture to the texture slot. But maybe you’re thinking “Hey, there! What about setting the light direction?”. Yes, the activate requires you to set constants that are global to all executions of the pass, and yes, the light direction in world space is global. However, as we said before, we’re performing all lighting model space. This means we need to transform the light direction for each object and pass that along. Because the value then depends on the renderable, we can’t do that here. Of course, if we were using world or camera space it would be assigned here.
Deactivating requires us to also deactivate the vertex attribute slot used for the vertex normals, which we’ll be assigning per object. Having already mentioned we’d be relying on the pass’s existing clean-up functionality, we just bump up the _numUsedStreams property to 3 (vertex positions, uv coords, and vertex normals).
public function SingleLightTexturePass(texture : Texture2DBase)
{
 super();
 _texture = texture;

 // tell the material how many resources are used so it will know which to clear when switching passes.
 _numUsedStreams = 3; // vertex position, uv coords and normals
 _numUsedTextures = 1; // a single texture
}
Rendering
Finally, we’ll need to upload the newly required data to the gpu, which happens in the render method. First we’ll consider the light.
As a quick recap of assigning lights to materials: lights that affect a given material are stored in a “light picker” object. Generally you’ll be using StaticLightPicker, which really is just a fixed container of lights. It’s the only light picker Away3D provides out of the box at this moment, with most dynamic picking schemes being very specific to individual use cases. If you’ve read any of the basic or intermediary tutorials, you already know how to assign a light picker to a material. In our case it looks like this:
light = new DirectionalLight(-1, -1, 1);
view.scene.addChild(light);

material.lightPicker = new StaticLightPicker([light]);
The light picker object we assigned to the material will be available in the pass so we can query the lights by type. We only need the first directional light:
var light : DirectionalLight = _lightPicker.directionalLights[0];
Then we transform its direction to model space. That is simply done by multiplying the scene direction vector with the renderable’s inverse transformation matrix (if you’re rusty on your basic matrix math and don’t know why this is happening, refer to literature: you really shouldn’t allow yourself to be rusty on this! ;) )
Having transformed everything, it’s simply a matter of assigning it to the fragment shader. We’re assigning the negated scene direction here (ie: the direction from the object to the light) because the lighting calculations expect it this way. We’d be wasting gpu cycles doing the negation in the fragment shader otherwise.
// the light direction relative to the renderable object (model space)
var objectSpaceDir : Vector3D = renderable.inverseSceneTransform.transformVector(light.sceneDirection);
objectSpaceDir.normalize();

// passing on inverse light direction to simplify shader code (it expects the direction _to_ the light)
_fragmentData[0] = -objectSpaceDir.x;
_fragmentData[1] = -objectSpaceDir.y;
_fragmentData[2] = -objectSpaceDir.z;
context.setProgramConstantsFromVector(Context3DProgramType.FRAGMENT, 0, _fragmentData, 1);
Finally, supplying the vertex normals, which is no different from assigning any other default vertex attribute, this time to slot 2:
renderable.activateVertexNormalBuffer(2, stage3DProxy);
Conclusion
Finally, you can see the new shader in action:
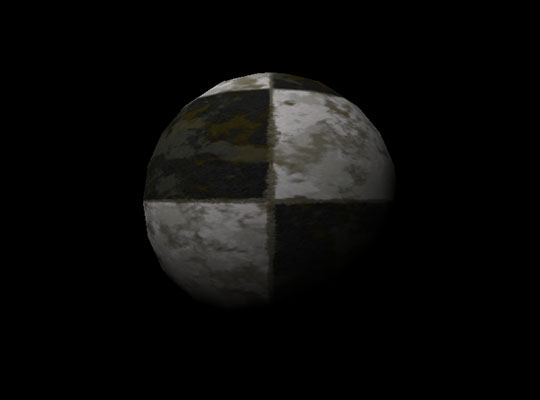
Listing 1. SingleLightTextureMaterial in action
Source code.
And that’s it! This tutorial provides a good starting point for playing around with a lot of things. You can take a look at implementing phong reflections or even normal mapping (hint: tangents are provided similarly to normals and bitangents can be gotten as the cross product of the two). Next time, we’ll take another small step to support multiple lights “single-passedly”, which will highlight a few more aspects of the material internals.